说明
使用@Async注解创建多线程非常的方便,还可以通过配置,实现线程池。比直接使用线程池简单太多。而且在使用上跟普通方法没什么区别,加上个@Async注解即可实现异步调用。
用法
AsyncTask.java
1
2
3
4
5
6
7
8
9
10
11
12
13
14
| @Component
public class AsyncTask {
private static final Logger LOG = LoggerFactory.getLogger(AsyncTask.class);
@Async
public void register(){
LOG.info("多线程开始注册模拟");
try {
Thread.sleep(1000*1);
} catch (InterruptedException e) {
e.printStackTrace();
}
LOG.info("多线程注册成功");
}
}
|
这里只是做一个简单地打印输出,使用Log4J打印是为了方便看到线程名
AsyncTaskController.java
1
2
3
4
5
6
7
8
9
10
11
12
13
14
15
| @RestController
@RequestMapping(value = "/async")
public class AsyncTaskController {
private final static Logger LOG = LoggerFactory.getLogger(AsyncTaskController.class);
@Autowired
private AsyncTask asyncTask;
@GetMapping(value = "/test")
public Object test(){
for (int i = 0; i < 10; i++) {
asyncTask.register();
}
System.out.println("主线程结束");
return "OK";
}
}
|
这里循环创建10个线程
启用Async
启用Async需要添加@EnableAsync注解
1
2
3
4
5
6
7
8
| @SpringBootApplication
@ServletComponentScan
@EnableAsync
public class App {
public static void main(String[] args) {
SpringApplication.run(App.class, args);
}
}
|
结果
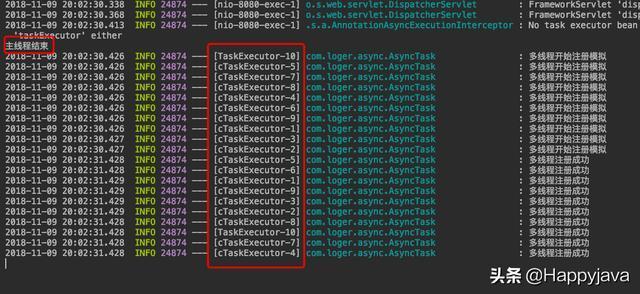
可以看到,主线程结束已经结束。可证证明多线程起了效果。另外通过查看线程名,可以看到创建了10个线程去执行。
使用线程池
通过上面的结果可以看出,直接使用@Async注解是直接创建线程去执行的。但是在实际开发中,都应该使用线程池去管理线程,节省线程开销。
配置
TaskExecutorConfig.class
1
2
3
4
5
6
7
8
9
10
11
12
13
14
15
16
17
18
19
20
21
22
23
24
25
26
27
28
29
30
31
32
33
34
35
| import org.springframework.context.annotation.Configuration;
import org.springframework.scheduling.annotation.AsyncConfigurer;
import org.springframework.scheduling.concurrent.ThreadPoolTaskExecutor;
import java.util.concurrent.Executor;
@Configuration
public class TaskExecutorConfig implements AsyncConfigurer {
private static final int CORE_POOL_SIZE = 2;
private static final int MAX_POOL_SIZE = 2;
private static final int QUEUE_CAPACITY = 10;
@Override
public Executor getAsyncExecutor() {
ThreadPoolTaskExecutor taskExecutor = new ThreadPoolTaskExecutor();
taskExecutor.setCorePoolSize(CORE_POOL_SIZE);
taskExecutor.setMaxPoolSize(MAX_POOL_SIZE);
taskExecutor.setQueueCapacity(QUEUE_CAPACITY);
taskExecutor.initialize();
return taskExecutor;
}
}
|
这里设置了最大两个线程。
测试
重启程序测试下:
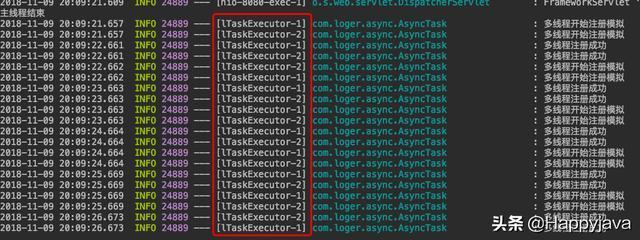
结果
可以看到只有两个线程在执行,证明配置的线程池起作用了。